
.png)

If you've spent any time in software development, you've heard CI/CD thrown around a lot. But before jumping into Cypress integration, it's worth being clear about what the pipeline actually does because a lot of integration headaches come from misunderstanding the flow.
.webp)
What Is a CI/CD Pipeline, and Why Does It Matter?
CI/CD stands for Continuous Integration and Continuous Delivery (or Deployment). CI is the practice of merging code changes frequently and running automated tests on each merge. CD takes the output of a successful CI run and either deploys it to staging automatically (continuous delivery) or all the way to production (continuous deployment).
Here's what a typical pipeline does in order:
- Pulls the latest code from the repository
- Installs dependencies
- Runs unit and integration tests
- Runs end-to-end (E2E) tests
- Deploys to staging or production if all tests pass
- Notifies the team of failures (or successes)
Which CI/CD Tools Are Actually Used in Production?
There's no shortage of CI/CD tools. The ones you'll encounter most in real projects:
What Is Cypress, and Is It the Right Tool for Your Pipeline?
Cypress is an open-source end-to-end framework for testing built specifically for modern web applications. Unlike Selenium, which controls the browser via WebDriver from outside the process, Cypress runs directly inside the browser. That means faster execution, better debugging, and no flaky waits caused by network latency between the test runner and the browser.
Some numbers worth knowing:
Cypress crossed 6 million weekly npm downloads in 2024, supports Chrome, Firefox, Edge, and Electron out of the box, and is free for unlimited local runs. Cypress Cloud (paid) adds parallelization and test analytics.
.webp)
Cypress is a good fit if:
- Your team is working on a React, Vue, Angular, or plain HTML/JS frontend
- You want tests that interact with the UI the same way a user would
- You need screenshots and videos of test failures automatically captured
It's not the right tool if you're testing native mobile apps or non-browser interfaces - that's Appium territory.
Getting Started: What You Need Before Integration
Don't skip this. Missing a prerequisite is the most common reason CI runs fail on the first push.
Prerequisites:
- Node.js 16+ (Cypress drops older Node support frequently - check the Cypress documentation
- A working application that can be started via a CLI command
- A GitHub repository with push access
- npm or yarn (Cypress doesn't officially support pnpm for all features)
Bash
  #Verify your Node Version
Node-v

#Should return v16 .x .x or higher
How to Integrate Cypress into Your CI/CD Pipeline
Let's walk through this concretely. The example app is a simple Node.js + Express server with a contact form - something close to what most small web projects look like.
Step 1: Display the Contact Form and Run the Server
Before Cypress can test anything, your app needs to be running. In CI, this means starting the server as a background process before the test command fires.
Create a basic server.js if you don't have one:
<!DOCTYPE html>
<html lang="en">
<head>
  <meta charset="UTF-8" />
  <meta name="viewport" content="width=device-width, initial-scale=1.0" />
  <title>Contact Form</title>
</head>
<body>
  <form id="contact-form" action="/submit" method="POST">

    <label for="name">Name</label>
    <input
      type="text"
      id="name"
      name="name"
      placeholder="Your name"
    />

    <br><br>

    <label for="email">Email</label>
    <input
      type="email"
      id="email"
      name="email"
      placeholder="Your email"
    />
<br><br>

    <button type="submit">Submit</button>

  </form>
</body>
</html>
const express = require('express');
const path = require('path');
const app = express();
app.use(express.static('public'));
app.use(express.urlencoded({ extended: true }));
app.get('/', (req, res) => {
res.sendFile(path.join(__dirname, 'public', 'index.html'));
});
app.post('/submit', (req, res) => {
const { name, email } = req.body;
console.log(`Form submitted by ${name} (${email})`);
res.send('Form received');
});
app.listen(3000, () => {
console.log('Server running at http://localhost:3000');
});
#for contact form
<form id="contact-form">
<input type="text" id="name" placeholder="Your Name" />
<input type="email" id="email" placeholder="Email" />
<button type="submit">Send</button>
</form>
Then create server.js to serve this form and handle form submissions. This server serves the HTML form at / and accepts POST submissions at /submit. You need it running on port 3000 before Cypress fires. In CI, you have two options for that: the bash & operator to background the process, or the start-server-and-test package. Use the package - it's more reliable and handles the readiness check automatically.
If you plan on running the server without blocking, you can accomplish this in two different ways:
- Using the Bash command
- Using the wait-on package combined with start-server-and-test (much better!)
- More later on that in the workflow definitions below.
Step 2: Install and Configure Cypress
Inside your project root:
Install and Initialize Cypress
#Cypress Base Configuration (cypress.config.js)#

bash
npx cypress open
#This creates a cypress.config.js file and a cypress/ folder.
#Update the config to point to your local server:#javascript
// cypress.config.js
const { defineConfig } = require('cypress');

module.exports = defineConfig({
  e2e: {
    baseUrl: 'http://localhost:3000',
    specPattern: 'cypress/e2e/**/*.cy.js',
    video: true,
    screenshotOnRunFailure: true,
  },
});
Step 3: Write Your First Cypress Test
Create a file at cypress/e2e/contact-form.cy.js:
Run it locally first to confirm it works:
#Contact Form End-to-End Test (cypress/e2e/contact-form.cy.js)#

describe('Contact Form', () => {
  beforeEach(() => {
    cy.visit('/');
  });

  it('should display the contact form', () => {
    cy.get('#contact-form').should('be.visible');
    cy.get('#name').should('exist');
    cy.get('#email').should('exist');
  });

  it('should accept user input', () => {
    cy.get('#name').type('hello');
    cy.get('#email').type('hello@example.com');
    cy.get('button[type="submit"]').click();
  });
});
If the tests pass locally, you're ready to push to CI. If they fail here, fix them before writing the GitHub Actions config debugging in CI is slower than debugging locally.
Cypress GitHub Actions Errors and How to Fix Them
Real problems you'll hit, and how to fix them:
The most common mistake: forgetting to start the server before running cypress run. Use this package to handle it
bash
npm install start-server-and-test --save-dev
Add to package.json:
json
"scripts": {
  "start": "node server.js",
  "cy:run": "cypress run",
  "test:e2e": "start-server-and-test start http://localhost:3000 cy:run"
}
Setting Up GitHub Actions for Cypress CI/CD
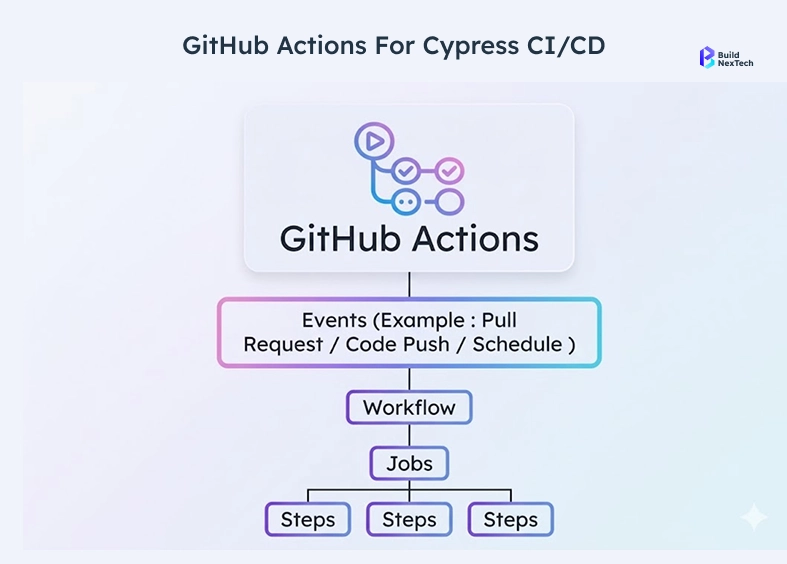
Now the actual automation. GitHub Actions runs on every push (or PR) and executes the workflow defined in .github/workflows/.
A few things worth noting in this config:
- npm ci is used instead of npm install - it's faster and uses the exact lockfile versions
- cypress-io/github-action@v6 handles the server start + wait-on internally, which is cleaner than doing it manually
- Artifacts (screenshots and videos) only upload on failure, so you're not wasting storage on passing runs

Step 4: Commit and Push the Workflow File
git add .github/workflows/cypress.yml
git commit -m "ci: add Cypress E2E test workflow"
git push origin mainGitHub will detect the new workflow file immediately and queue a run.
Step 5: Push to the GitHub Repository and Review Logs
After pushing, go to your repository on GitHub → Actions tab. You'll see the workflow running. Click into it to see each step.
What to look for in the logs:
- "Waiting for http://localhost:3000..." - confirms the server started
- "All specs passed!" - the Cypress output you want to see
- "Uploading artifacts" - only appears if a test failed
If the run fails, the logs will show you exactly which step failed and why. The most common failure points:
- npm ci fails → missing package-lock.json in the repo
- Server doesn't start within 60 seconds → increase wait-on-timeout
- Cypress can't find test files → check specPattern in cypress.config.js
How to Analyze a Failed Job
Click the failed step in the Actions log. GitHub shows the raw terminal output. Look for:
- Error: lines in red
- The spec file and line number where the test failed
- Cypress's screenshot path if a visual assertion failed
If the failure is intermittent (flaky test), add a retry config to your cypress.config.js:Retries are a band-aid, not a cure. If a test is consistently flaky, the test itself has a problem - usually a missing cy.wait() for an async operation or a selector that changes between renders.
// cypress.config.js -- update your existing file, do not create a new one
const { defineConfig } = require('cypress');

module.exports = defineConfig({
  e2e: {
    baseUrl: 'http://localhost:3000',
    specPattern: 'cypress/e2e/**/*.cy.js',
    video: true,
    screenshotOnRunFailure: true,
    retries: {
      runMode: 2,    // retries in CI
      openMode: 0,   // no retries in local GUI
    },
  },
});Wrapping Up
The sequence that works in order:
- Get the app running locally and tests passing there first
- Install start-server-and-test to handle the server-test handoff
- Write a focused cypress.config.js with the correct baseUrl
- Use cypress-io/github-action in your workflow - it handles more edge cases than rolling your own
- Upload artifacts on failure so you can debug without re-running the job
The teams at bnxt.ai that have gone through this process find the biggest time-saver isn't the Cypress setup itself - it's the discipline of running tests locally before committing. CI exists to catch what slips through locally, not to be your first test environment.
If your pipeline passes on the first try, good. If it doesn't, the logs will tell you exactly what to fix.
Have questions about scaling Cypress across multiple services or running parallel test suites? Check out the bnxt.ai blog for more guides on test automation and product engineering.
People Also Ask

How do I run Cypress in GitHub Actions?
You need to create a workflow file at .github/workflows/cypress.yml in your repo. Inside it, use the cypress-io/github-action@v6 action which handles starting your server and running tests automatically. Make sure your package.json has a start script defined and that your baseUrl in cypress.config.js matches the port your server runs on.
What is Cypress Cloud?
Cypress Cloud is the paid dashboard service offered by Cypress. It lets you run tests in parallel across multiple machines, view recorded test videos, track flaky tests over time, and see historical test results. The local Cypress setup is completely free - Cypress Cloud is an optional add-on for teams that need faster runs or deeper analytics.
How do I fix the ECONNREFUSED error in Cypress CI?
This error means Cypress tried to visit your app but the server wasn't running yet. The fix is to use the start server-and-test package, which waits for your server to be ready before firing the test command. Install it with npm install start-server-and-test --save-dev and update your package.json scripts as shown in Step 3 of this guide
Why do my Cypress tests pass locally but fail in CI?
The most common reasons are a baseUrl mismatch, a browser version difference between your machine and the CI environment, or the server not fully starting before tests run. Start by checking your cypress.config.js has an explicit baseUrl set, use wait-on to ensure the server is up, and switch to Electron browser in your workflow if Chrome is causing inconsistencies.
What is the difference between Cypress and Playwright for component testing?
Playwright has a dedicated component testing mode built specifically for testing individual UI components in isolation. Cypress offers something similar but it is still in experimental status. For full end-to-end browser testing, both tools are capable - but if component-level testing is your primary need right now, Playwright's implementation is more mature and stable.


.webp)
.webp)
.webp)